
Introduction
There are three steps to setting up your AbeBooks account in BookRouter™. First, you must confirm that AbeBooks has prepared your account to receive BookRouter™ uploads. Second, you must find and enter your login credentials into BookRouter™. Third, you must enable uploads which will automatically send a full inventory file as a purge and replace.
Contacting AbeBooks: You can send an email to AbeBooks support or you can use the web contact form in your seller tools. We have found the web form receives a more consistent response.
Web Form: Sellers can sign into their Seller Account on AbeBooks.com and use the "Customer Support" link at the bottom of each webpage. Instructions with screenshots below.
Email support: Sellers can send an email to seller@support.abebooks.com
IMPORTANT Note on emailing support: Sellers MUST send emails from the same email address registered with AbeBooks.com. They will not receive emails from other addresses.
Step One: Confirm that AbeBooks is ready to receive BookRouter™ files
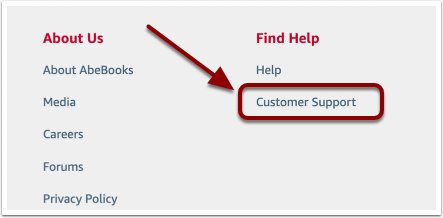
To access the Web Contact Form: Log in to your AbeBooks account, scroll down to the footer and click on 'Customer Support'.
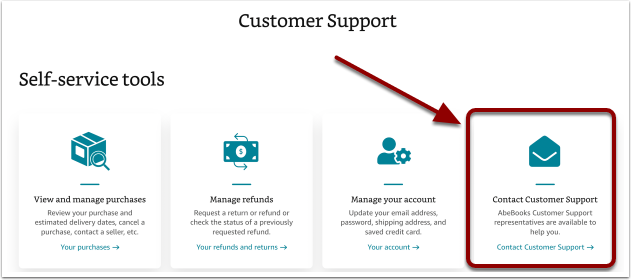
Under the 'Self-service tools' heading, click 'Contact Customer Support'.
Click 'Selling'.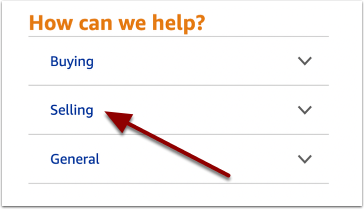
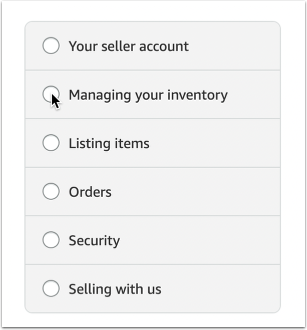
Click 'Managing your inventory'.
Click 'Inventory files'.
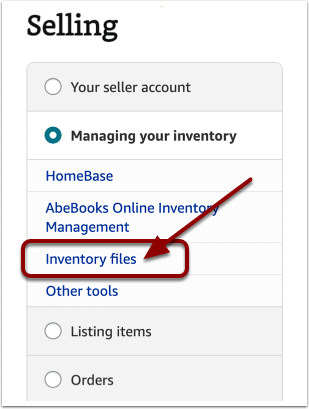
Next, send a message to AbeBooks customer support.
Copy everything in the blue box below and submit via the web form or send via email to AbeBooks support.
Dear AbeBooks Support,
Please note my new upload file is now coming from BookRouter™ in your standard AbeBooks format per your support documentation here:
https://support.abebooks.com/selling/s/article/required-data-structure?language=en_US
Please notify me a soon as you have made the necessary changes to my account so that I may begin to upload my records as soon as possible.
Sincerely,
XXXXXXX
Step Two: Locate your FTP Username and FTP Password/API Key in your AbeBooks Seller Tools and copy them to your BookRouter™ AbeBooks Marketplace settings
Important: Your AbeBooks website username and password are NOT the same as the FTP/API credentials used by BookRouter™ to send AbeBooks inventory.
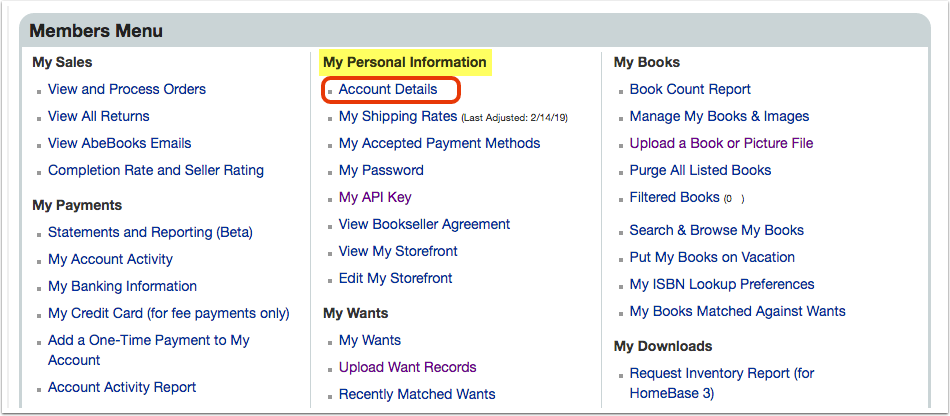
Login to AbeBooks Seller Tools. Scroll down to the 'Member's Menu' then click 'Account Details' under the 'My Personal Information' heading.
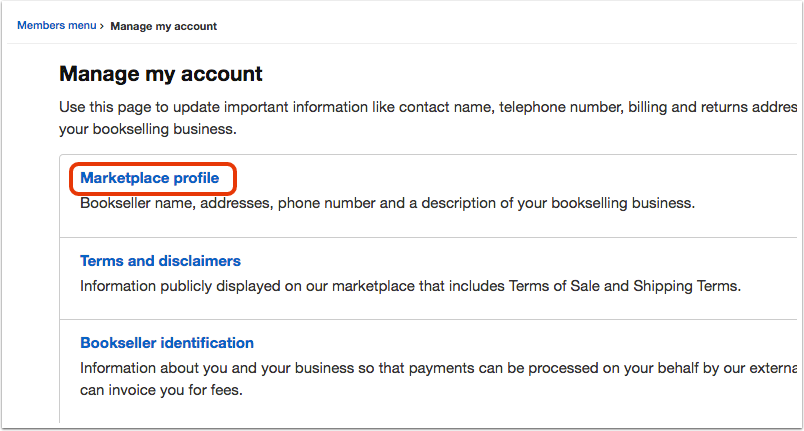
Click on 'Marketplace Profile'.
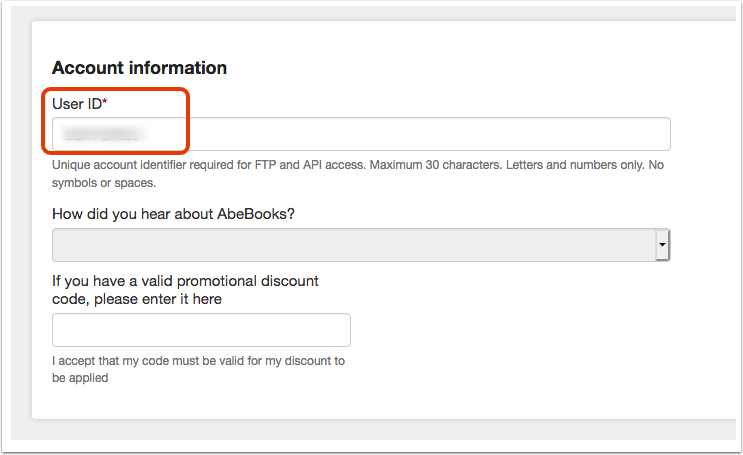
Scroll down to 'Account information'. The 'User ID' is your FTP Username.
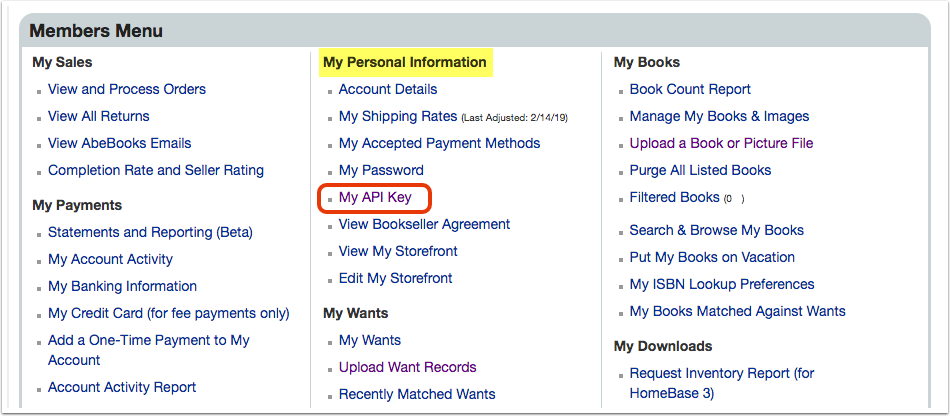
Click on 'My Account' and scroll down to return to the 'Member's Menu'. Then, click 'My API Key' under the 'My Personal Information' heading.
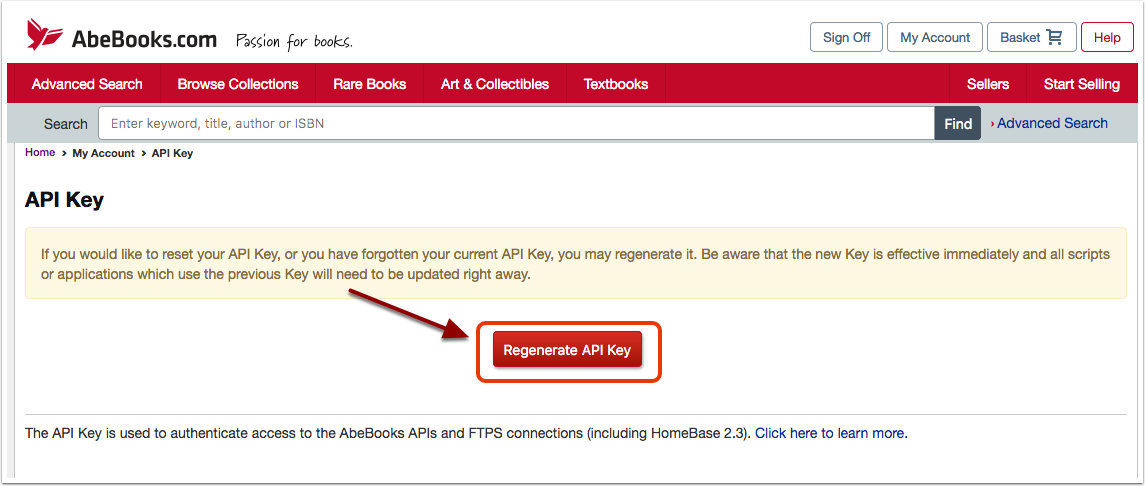
 Click on the 'Regenerate API Key' button. Please be sure to copy and save the API Key.
Enter your FTP Username and FTP Password/API Key into BookRouter™
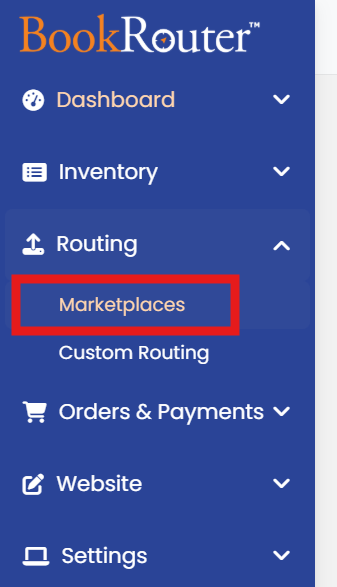
Login to your BookRouter's Admin/BookRouter admin. Click on 'Marketplaces' under the 'Routing' heading.
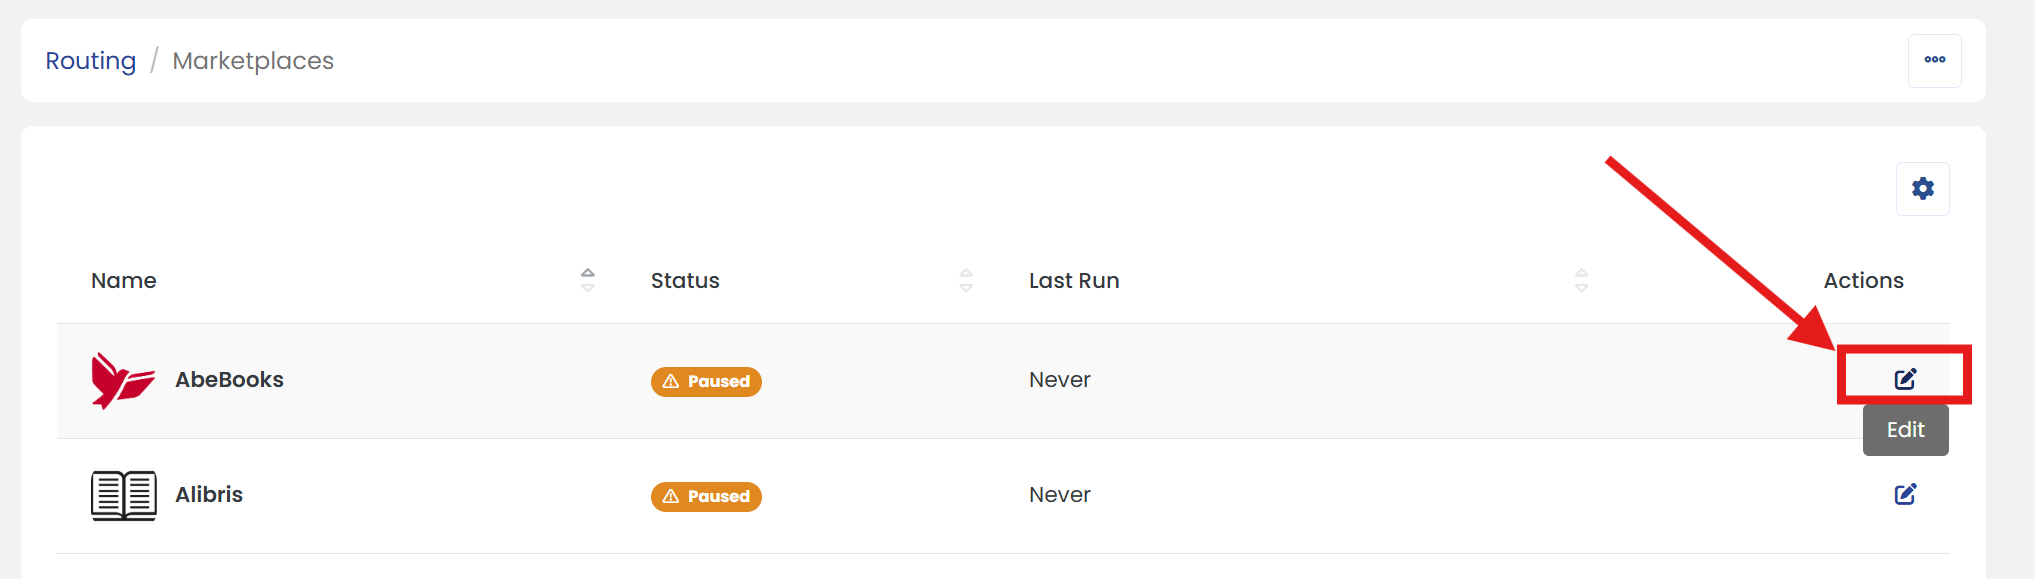
In the Marketplaces list, locate 'AbeBooks', then click the 'Edit' icon in the 'Actions' column to update its details.
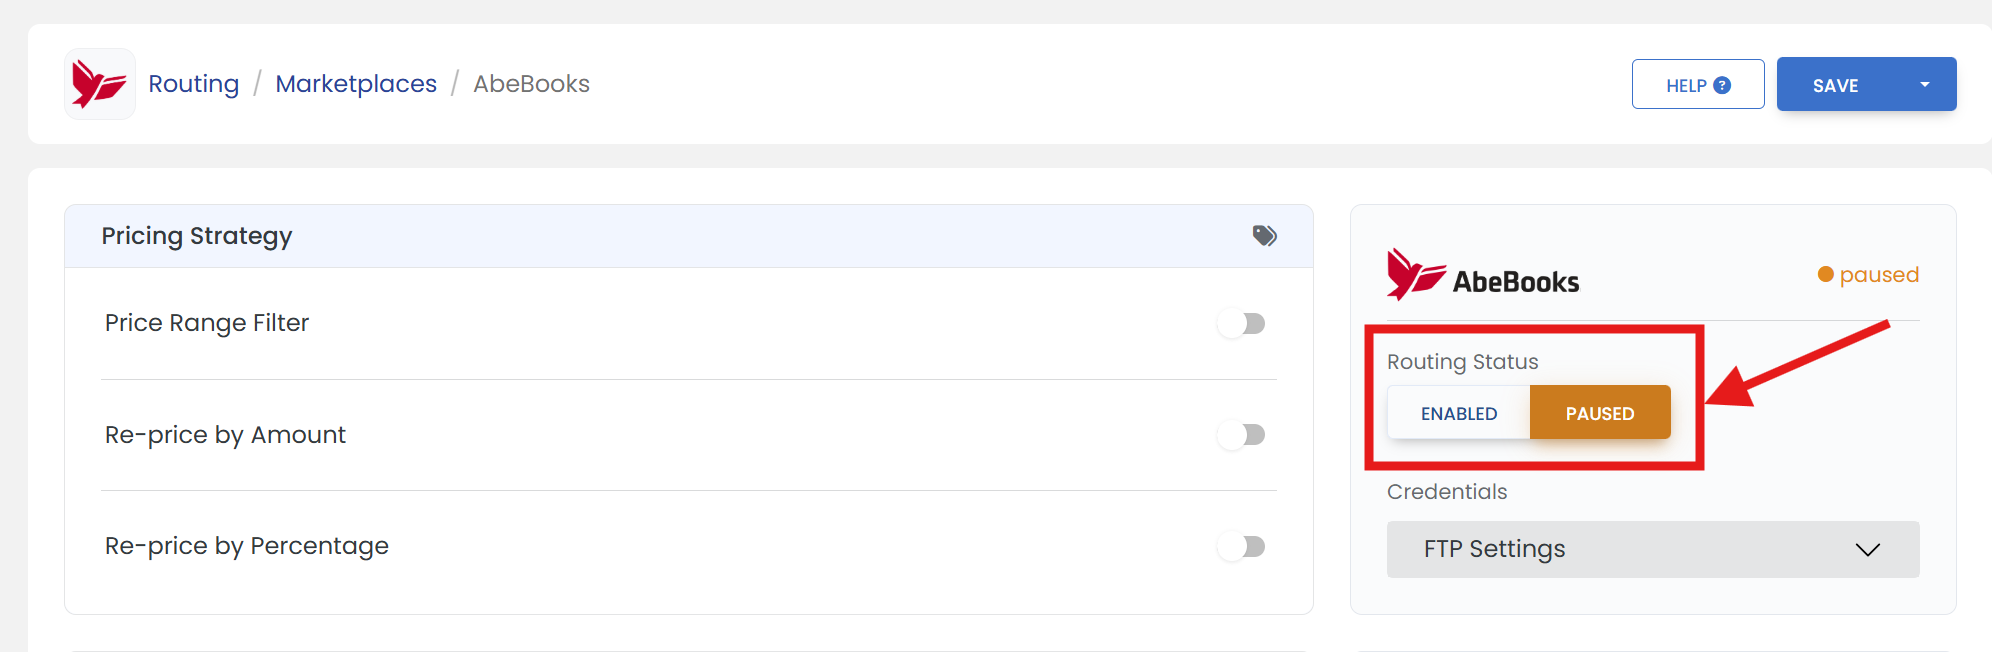
On the right-side panel, leave the 'Routing Status' set to 'Paused' until you receive confirmation that AbeBooks has adjusted your upload format.
Under Credentials title, click on the FTP Settings dropdown, enter your FTP Username and FTP Password, then click 'SAVE'.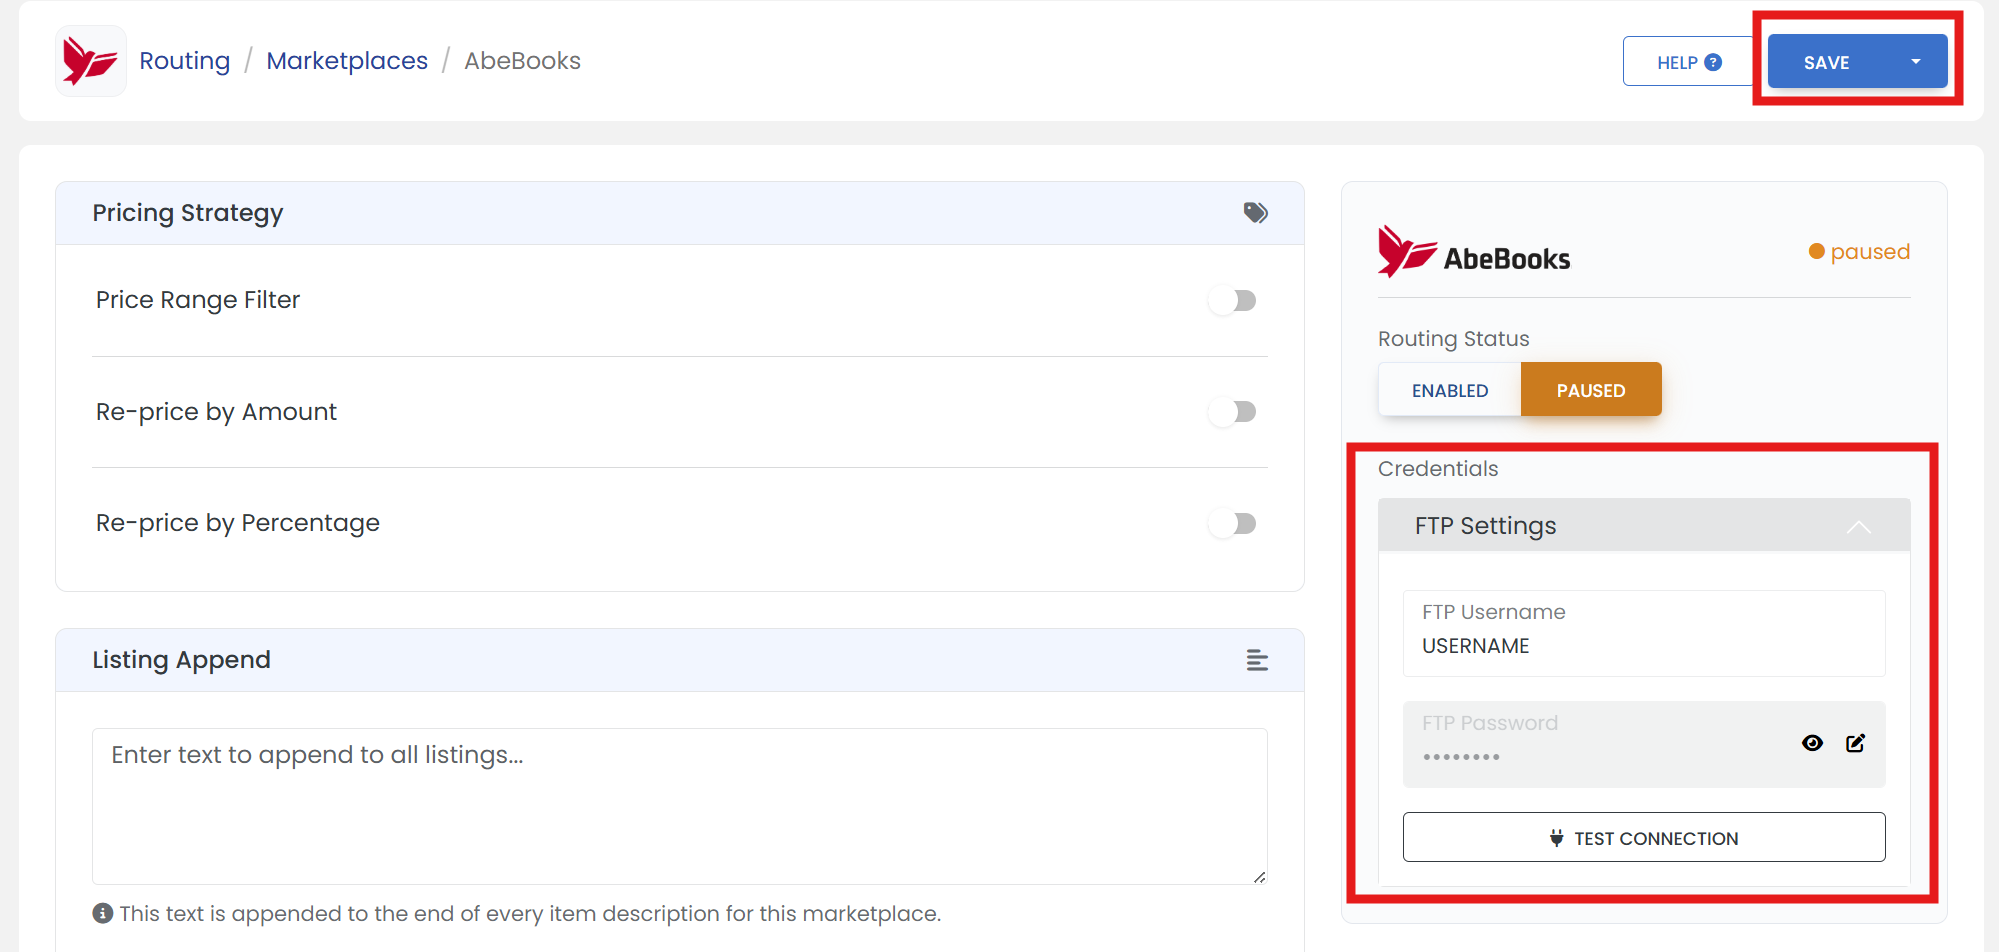
Step Three: Enable AbeBooks file and order synchronization
Once you are connected via FTP and once AbeBooks has confirmed that your upload format has been adjusted, you can enable the marketplace at anby time. Beforehand, you may wanbt to update your 'Pricing Strategy' details and 'Sync Rules' preferences. Once you are ready, change the following settings:
Routing Status: set to “Enabled”
Include Images: set to “Yes”
Purge Ready: set to “Yes” (only do this if your website inventory is up to date)
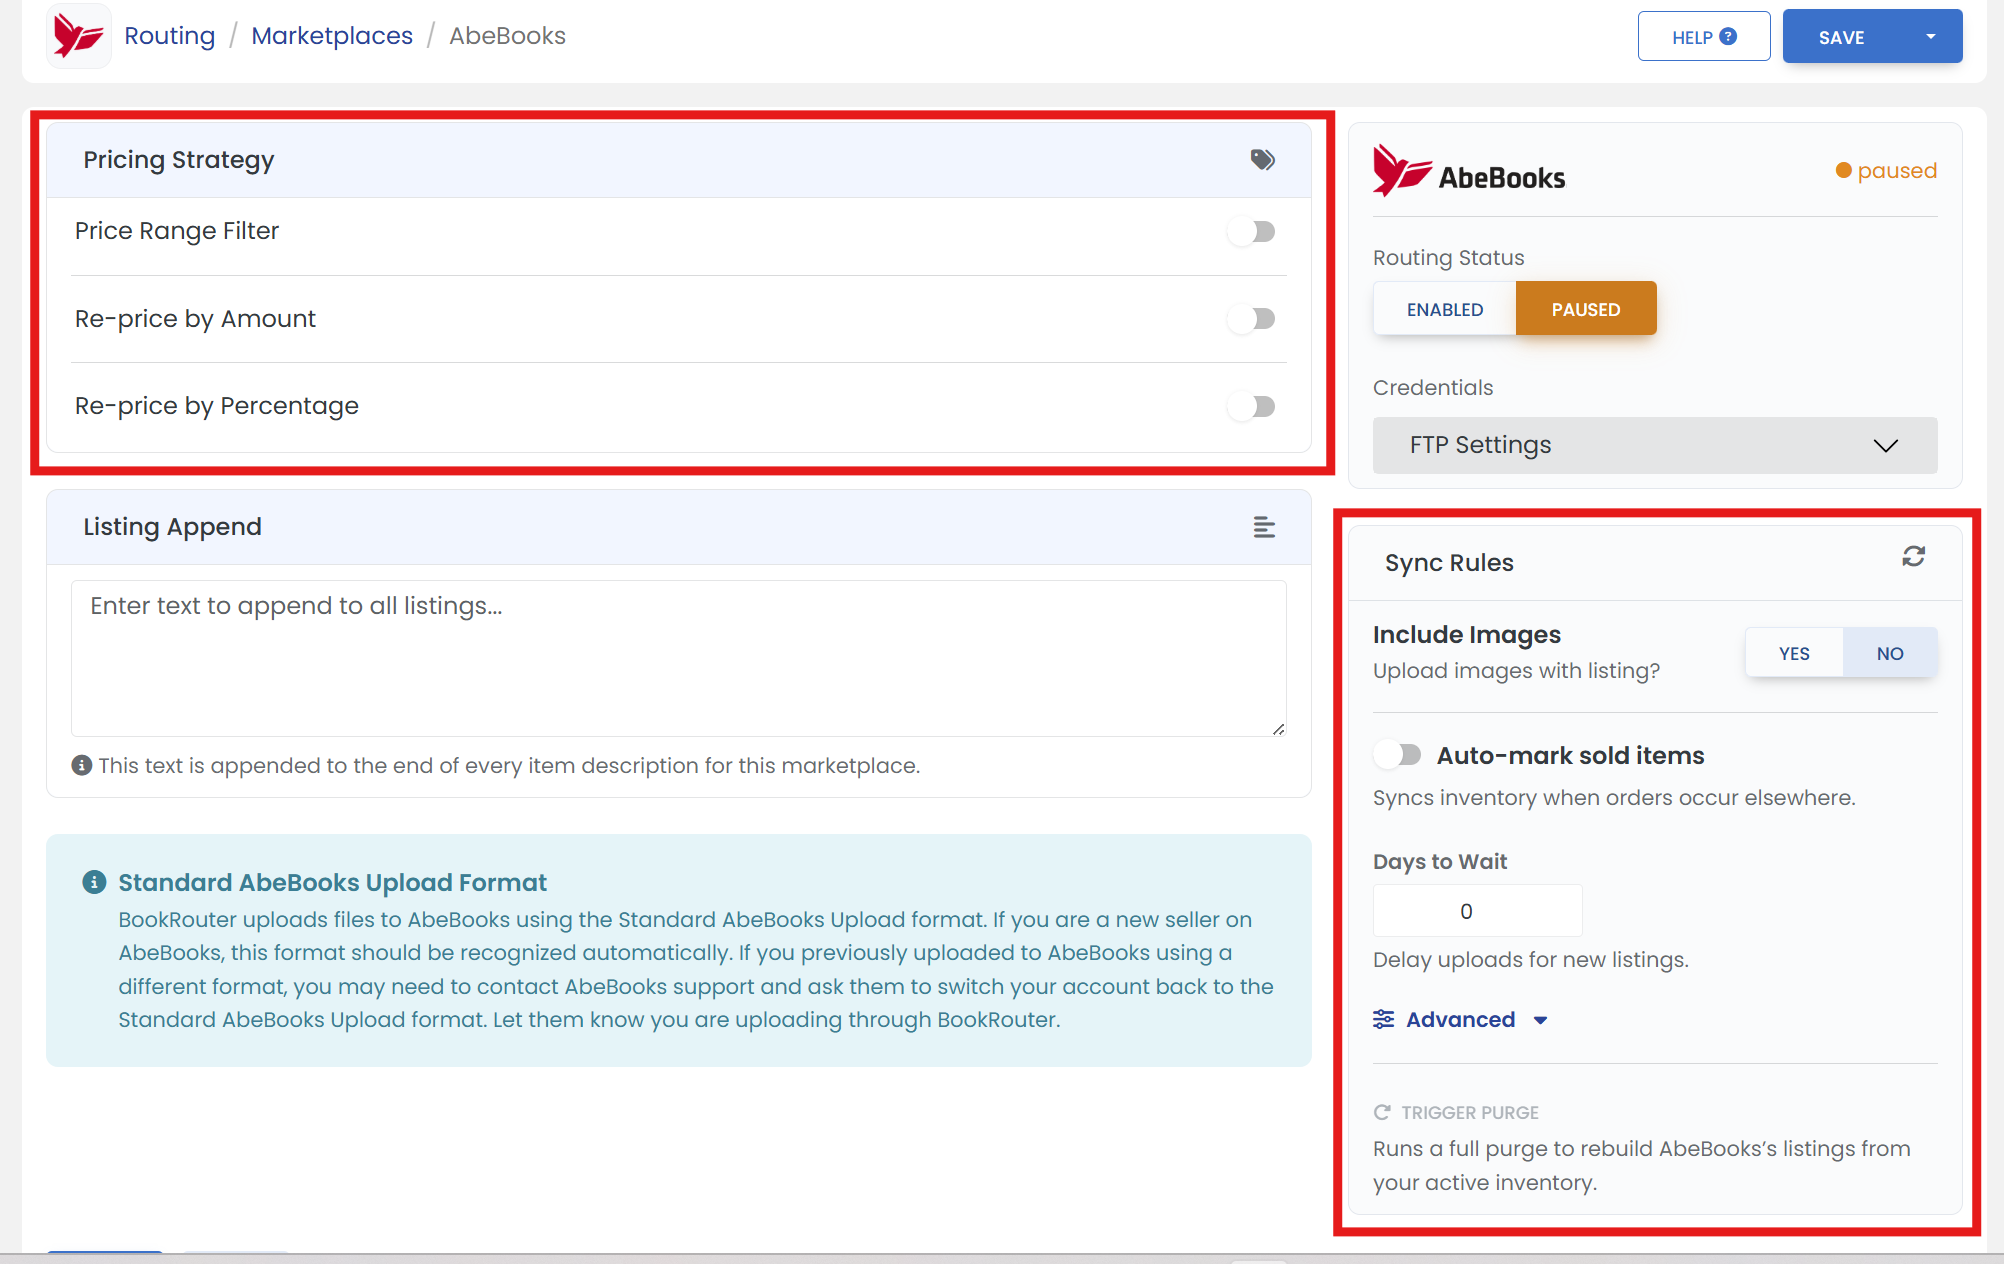
Don't forget to save
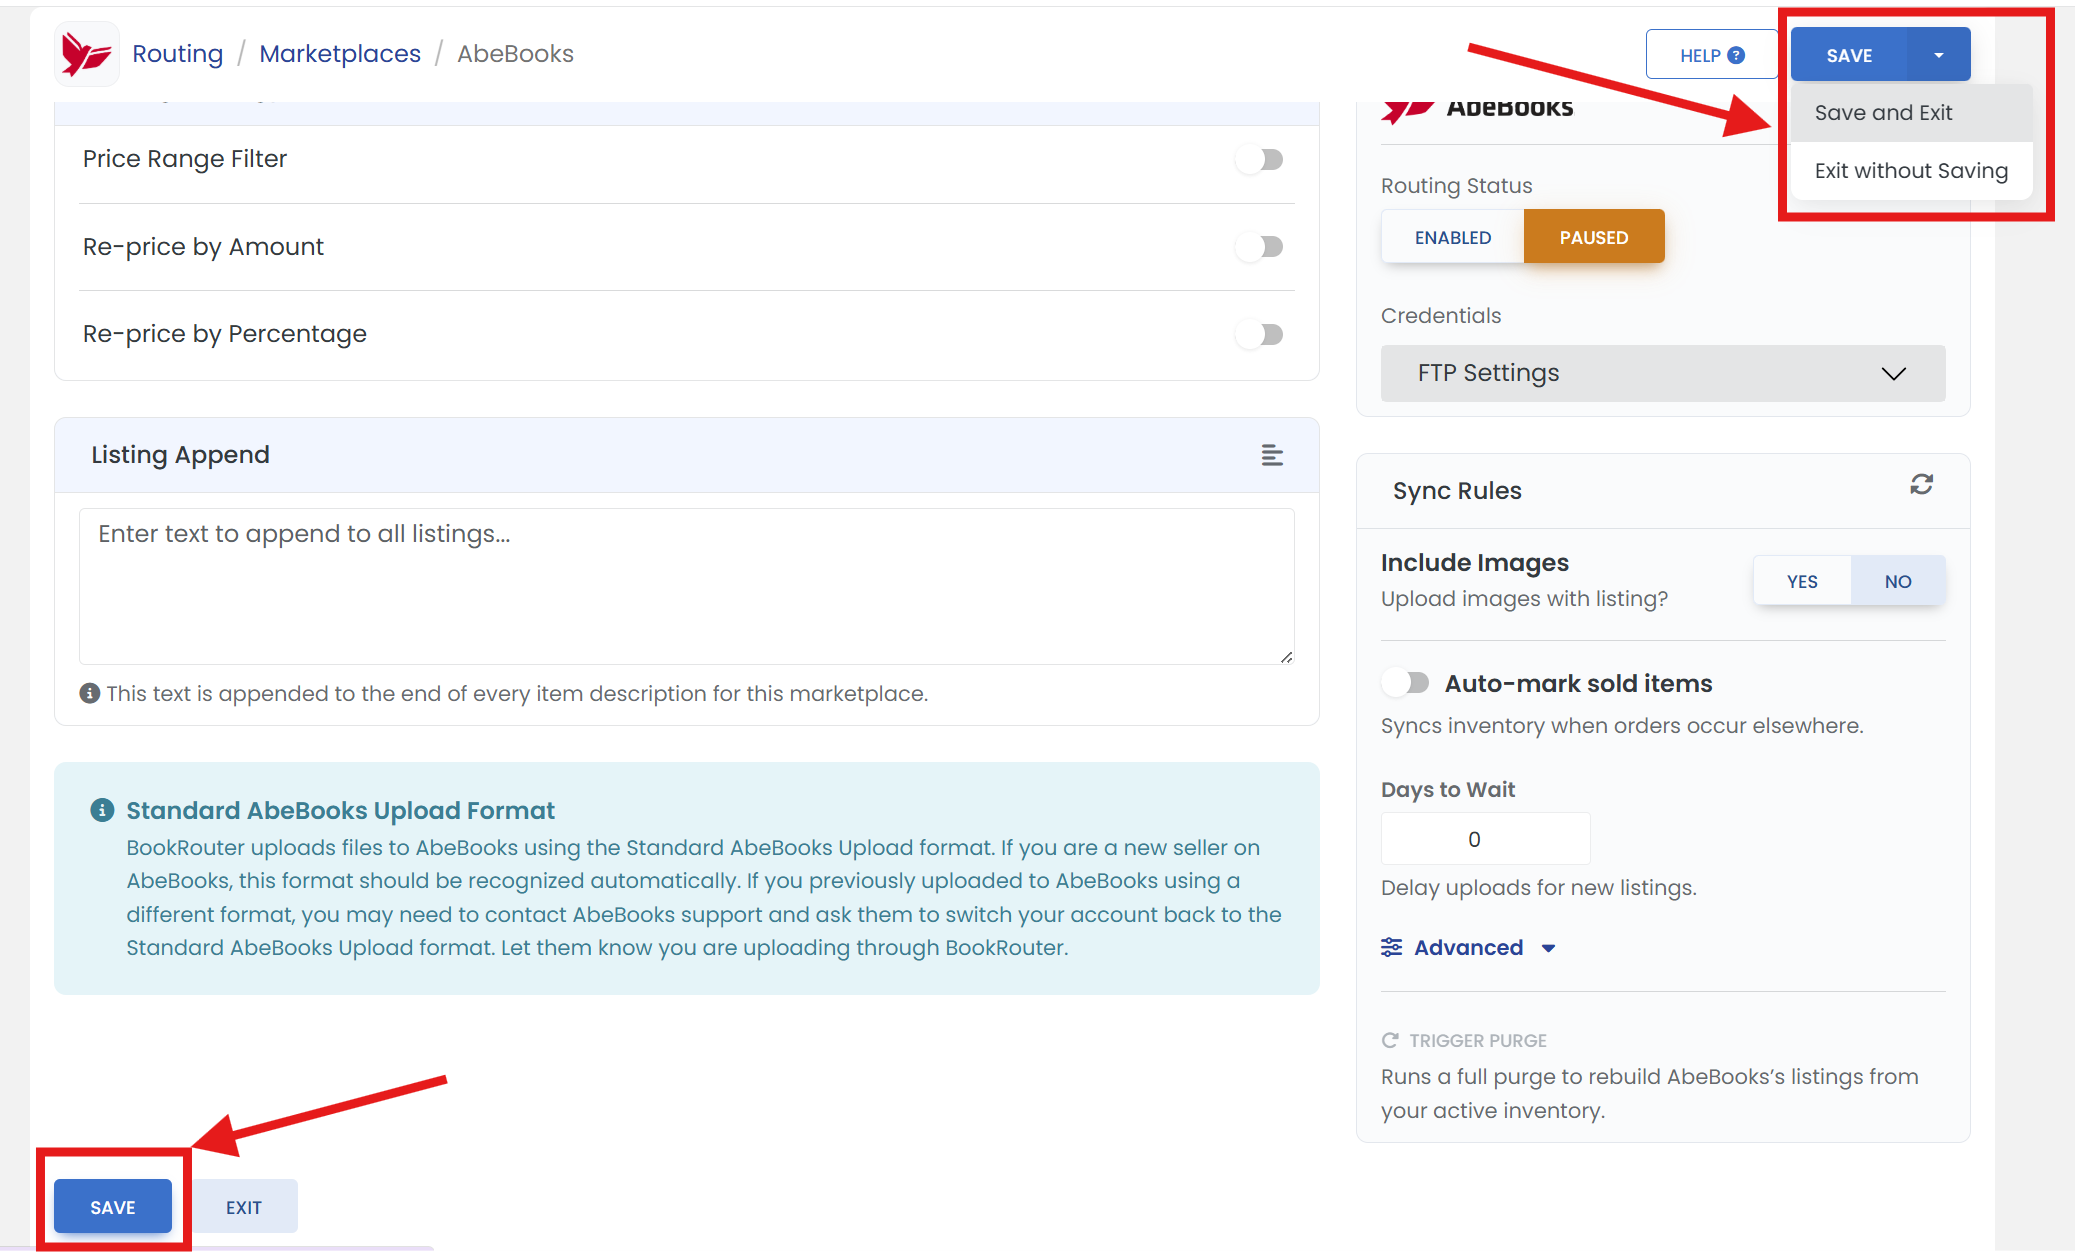
After making the changes, scroll down to click the 'SAVE' button to apply the changes.
You can choose from the 'Save' dropdown options in the top-right corner:
a) Save and Exit – Saves your changes and closes the page.
b) Exit without Saving – Leaves the page without saving your changes.
Be sure to select Save and Exit if you want your updates to be applied.
Within in an hour, our system will send a purge/replace file with all of your active inventory items. Going forward, we will upload adds and deletes as they are received on the website.